")

Accessing the User Management Section
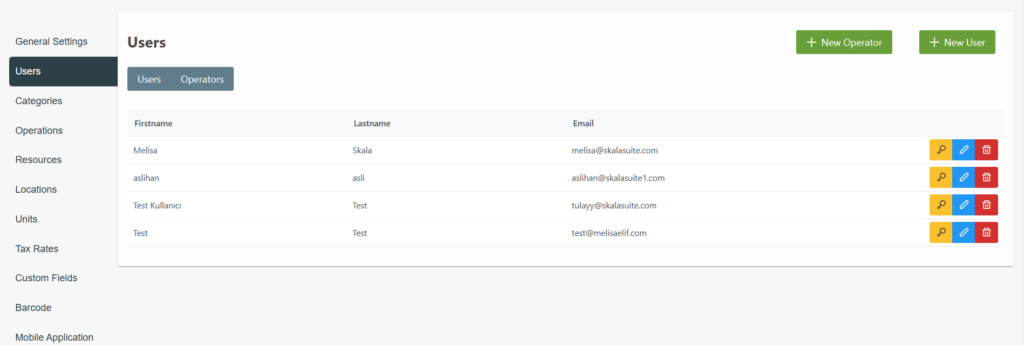
From the horizontal menu at the top of the Skala interface, navigate to the Settings tab. On the newly opened page, select Users from the options listed on the left-hand side. The Users menu includes two types of user accounts:
- Panel Users:
These are key users registered in the “User” category and have access to the Skala MRP panel.
How to Add a New User
- Navigate to Settings > Users.
- Click on the + Add New User button.
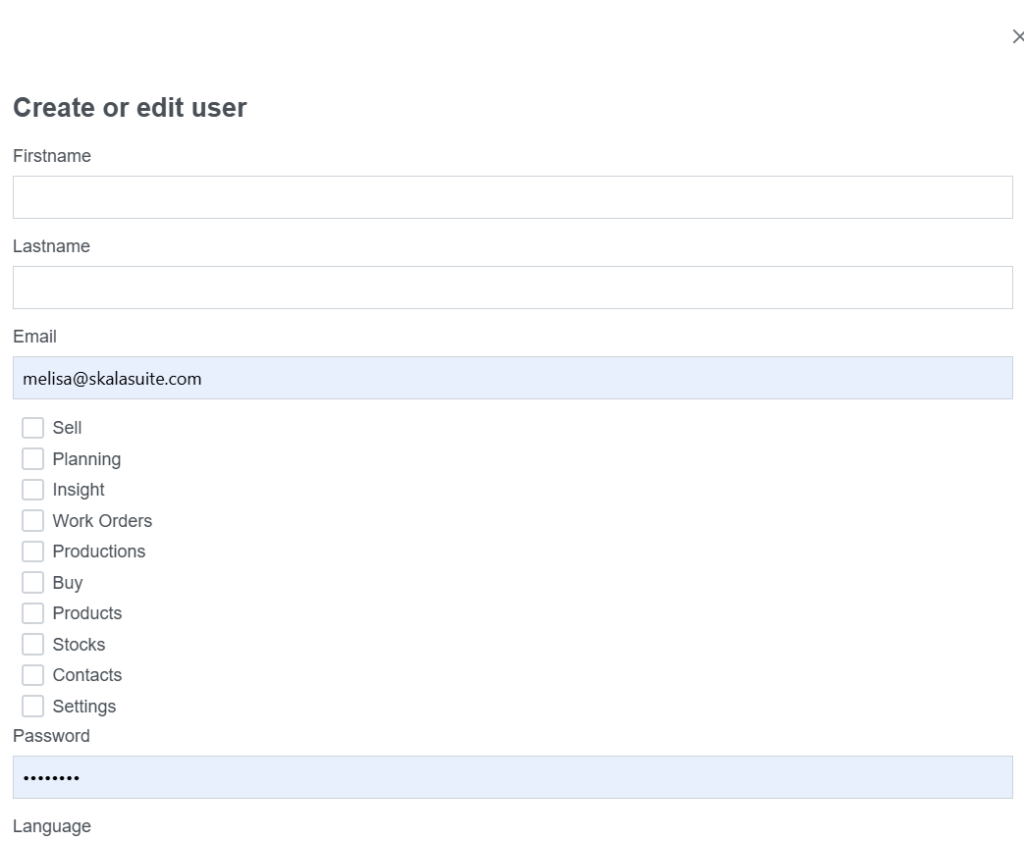
- This will open the “Add New User and Manage Permissions” screen.
- Enter the user’s First Name, Last Name, and Email Address.
- Create a password for the user.
- Click Save to add the new user.
Note: The email address will serve as the username, and the fields for First Name and Last Name are mandatory.
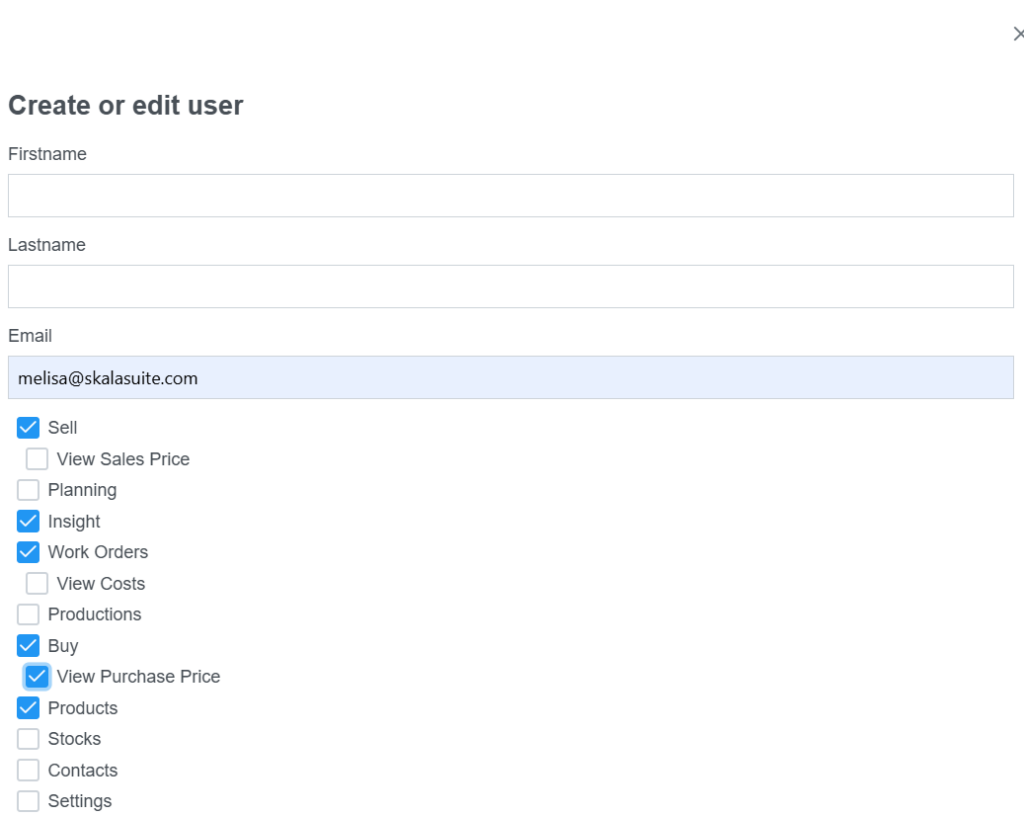
Editing User Permissions
- In the Users menu, find the user you want to edit.
- Click the blue pencil icon next to their row to open the user editing screen.
- From the displayed list, select or deselect the modules you want to grant or revoke access to.
- Save the changes.
The main admin can control which parts of Skala the new user can access. Once logged in, the user will only see the areas they’ve been granted permission to access.
Changing the Interface Language
- In the Users menu, click the blue pencil icon for the desired user.
- Select the preferred language in the user editing screen.
- Save the changes.
- The language change will take effect after the user logs in again.


Changing Passwords
- In the Users menu, locate the user or operator whose password needs updating.
- Click the key icon in their row.
- Enter a new password in the password change screen.
- Save the changes.

Assigning Operations
- In the Users menu, click the blue pencil icon for the desired user or operator.
- Select the appropriate operations from the list in the user editing screen.
- Save the changes to complete the operation assignment.